Step 1: Make a plan
Gather all the supplies you need. Fibers, light source, scissors and everything to tile a floor. Then, before you start, you need to plan where you want the light source to be, since all the fibers have to run to this point. The light source should be placed outside the room, since this is safer. Once you know where you are starting from, you can start running the fibers.
Step 2: Bundle and place your fibers
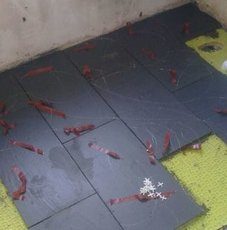
First you need to decide how many fibers per square meter you want. Than create your bundles, making each strand longer than the path it has to go. Cut the fibers about 30cm longer. Tie or tape the bundle tightly, near the point of the light source.
The first tile you will need to lay is the one closest to the light source. Start laying your tiles, spreading the fibers underneath. To keep the height of the tiles even, spread the fibers towards the direction they will be placed. Make sure to be careful with the starting point, since the first tile will have all the fibers underneath and won’t have much floor to stick to. You can spread them slightly to the side, to make it easier.
Step 3: Tiling
To tile the rest of the floor, start with holding up all the fibers. Only let the ones that have to go the way you’re going down. Make sure your tiles have plenty of adhesive to stick to. After doing this, you can put the tile down.
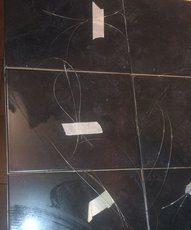
Fibers are delicate, make sure to give them a little space if you leave them up. You can leave them up by sticking them to the tile with tape. The further you go, the less fibers are under you tiles.
Step 4: Grout and make stars
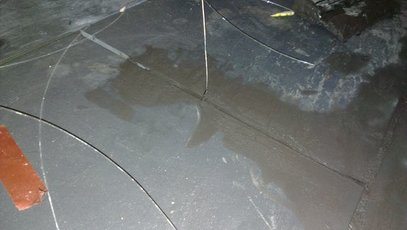
Where there are no fibers, you can grout as normal. Around the fibers, be careful. The first time it will leave small holes. After doing all the holes, you can do it a second time. Now it is time to cut the fibers. They need to be at tile level. Use a hot knife to cut them the right length. After cutting, you can fill up the holes in the grout.
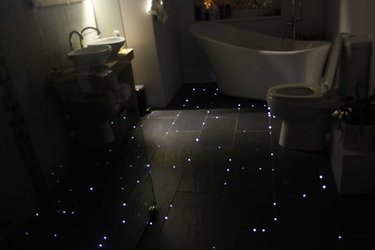
Step 5: Finish!
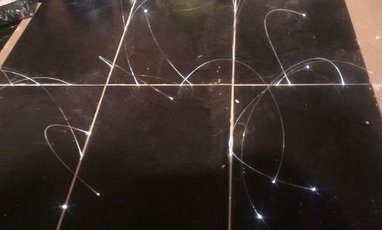
And now, the floor is done! It took some work, but you can now light up the stars!
Featured photo credit: Baldr via instructables.com